Saturday, December 17, 2011

JII Version 4.2: Fixed?

JII Web Simulation
I believe that I have fixed the problems that were causing the missing buildings in the web simulation.  It was apparently the result of some corrupted geometry in the Sketchup models.  In the process of cleaning that up, I managed to remove a lot of unnecessary parts and simplify the models.  It kind of needed to happen anyway.  I also derived a method for testing the issues at home instead of waiting to see the results the next day at work.  Turns out that the missing buildings only showed up on Windows XP machines.  Yay for compatibility mode.  Please let me know if any of you have continuing issues, but I think I got this one.
Oh... and I accidentally erased the escalators in the lobby.  Maybe when I restore them, I'll figure out how to make them work too.  :-)

Monday, December 12, 2011

Technical Problems

There have been some mysterious issues with the web simulation since the last update.  For many people, some of the buildings are missing and falling off the face of the Earth is common.  And I know the simulation won't load at all for others.  Sorry about that.  :-(

I probably should have said something about this sooner, but I honestly thought I'd fix the issue long before now.  Not so much...

I think I have tracked down the issue and hope to have it fixed shortly.  Unfortunately, everything looks perfect on my home computer so I don't know if the fixes worked until I test it out the next morning at work.  It's not the most optimal troubleshooting arrangement.  I'll get it though.  I promise.

Thanks for you patience and the helpful feedback several of you have given me.  :-)

Mike

Sunday, November 27, 2011

JII Version 4: Lobby Color and Ride Elevations

Version 4 of the interactive Journey Into Imagination simulation is up and running!

I've been working on the project quite a bit in the past 2 weeks.  90% of that work is behind the scenes stuff.  I had to do a lot of updating to bring the models up to speed with the new Play-up software version (that's a good thing).  I've also started trying to make the thing run better, and I must admit that there is a long way to go there.

Most importantly, I have rebuilt and upgraded the ride system (which had disappeared for a little while there).  It now runs better AND features elevation changes.  I finally gave up trying to find elevation blueprints and just worked out the elevations from watching online videos.  However, the trick is that I did it using videos of the current ride (which are much clearer than the old ride videos) and then compared the elevations against the old track plan.  I used both track plans and videos from Martin Smith to do this.  See here:

I've also temporarily added several placeholder photos of the ride scenes and some preliminary speed changes.  I'll adjust those speeds once I add the final soundtrack (that's my next major step).


Another thing that I've done in this version is adding a bit of color to the lobby.  I've been hunting for clean photos of the lobby murals and have had no luck.  I'm still looking but I went ahead and added what I could find for now.  I think it gives the proper look even if it isn't as accurate as I'd prefer.  The quest continues...


This version also features a new method for running music that I think sounds much better and is so much easier to manage for me.  I'm also starting to experiment with lighting.  In particular, I'm using lightmapping in a few places to varying degrees of success.  This is new to me but I'll get there.  I'm rapidly learning that my real-world understanding of theatrical lighting is almost entirely useless here.  Also, I'm using the free version of Unity 3D so lightmapping and shadows are limited.  Oh well.


Finally, this version has some simple effects added to it.  I think the animated fountains (not the jumping ones yet though) and sunlight flares add a nice finishing touch.  You be the judge.

Sunday, October 23, 2011

Bug Hunting in JII

This week, I have refocused my Journey Back Into Imagination efforts from adding elements to getting the web simulation engine optimized.  It's been getting bulky and has always been a bit sloppy in the controls.  


This task switch was well-timed.  The import tool that I use to get the Sketchup models into Unity is called Playup and it had a few bugs that I didn't really know how to deal with.  This is the very first 3D project I've ever attempted so I'm still very new at it.  Anyway, the biggest issue is that Playup was importing objects at a huge scale and rotated 90 degrees sideways.  I compensated for this by scaling up Unity components to match and by building my Sketchup models sideways.  These bugs have been fixed in the most recent version of Playup and it is wonderful.  However, it means that I have to go back and un-rotate the models, re-import them all and fix the upscaled Unity components.  It'll be worth it but the progress is slow going.  The ride system in particular is going to be a problem and it may need to be rebuilt from scratch.


As you can see in the attached screenshot, I have already fixed most of the exterior areas.  What you see here is about 1/100th the size of the last model.


I have also begun working on something called culling.  Using a Unity plug-in, I can now "turn off" items that are not immediately visible to save processor strain.  This sounded simple at first but doing it for the exterior is proving complicated.  The system uses zones of visibility, but my trouble is that the exterior is wide open and there is glass everywhere.  There are very few places where something is out of sight.  I'll figure it out.  This technique is going to be very important inside the ride though.  Things will be complicated in there and it will be nice to shut-off scenes that the riders aren't in.


Another thing I am adjusting is the controller sensitivity.  This is a lot easier now that the scale is smaller and more logical.  The mouse sensitivity in the next version will be less than 1/3rd of what it is right now.


The work load for these updates is pretty big.  What I think I'm going to do is get the scaling corrected in the exterior and EO Theater scenes but leave the ride scene alone until I can figure out the ride system issue.  I'll also get the controller sensitivity fixed and some basic culling in.  Then I'll update the web simulation at that point.  It'll be a bit of a step backwards since some previous elements might be missing (vehicles in lobby, EO canopy, trees) but at least it should run smoother.  This part isn't all that much fun but it'll be nice to have it done.


I'll let everyone know as soon as the fixes are published.


Tuesday, August 23, 2011

Big Changes


Big changes are happening for me and it has been a long time coming.  Anyone who has known me for longer than 10 minutes knows that my lifelong goal is to help design and build theme parks for a living.  A few days ago, I accepted a job with a company called Thinkwell Design and Production that does this very thing.  I start in September and the job is in Burbank (so I won't be moving again).
I will be a Technical Manager, helping take creative designs and figure out how to make them work in the real world.  My first assignment will be working on a new $1.5 billion theme park in China called Monkey Kingdom, but I may also be working on other projects at the same time.  Check out some pictures of Monkey Kingdom here.
I'm excited and terrified.  It's a little intimidating when when your dream for the last 3 decades is suddenly real and sitting right in front of you.  I'm very happy, but part of me still can't believe this is happening.

Tuesday, August 16, 2011

Florida Vacation

Harry Potter at IOA
I have just returned from a great vacation to Orlando.

Pictures, pictures, pictures....

This vacation was a trip to the WDW and IOA theme parks and also a family reunion.  There were 19 of us though the group never got bigger than 16 at a time.

"How many in your party?"
"A metric ****-ton.  Just give us the whole boat, please."

In addition to a much overdue family visit, this was my first time back in Orlando since I left Disney back in 2007.  I didn't get to see a lot of my old friends and co-workers but I did get to see some.  Good times.

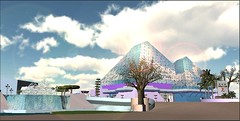
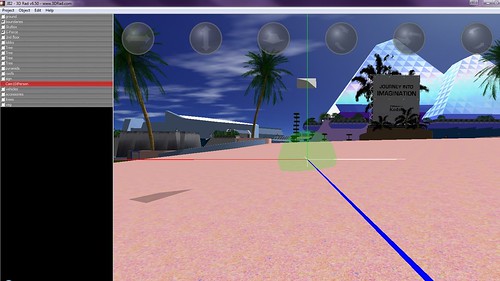
I also got to see all of the new things that have been added to WDW and IOA since I left (although some of it was technically added before I left but I never had the chance to check it out).  And since I'm a hardcore theme park nerd, this is the part where I dish on those new additions.  If you aren't a theme park nerd, you may want to eject now.
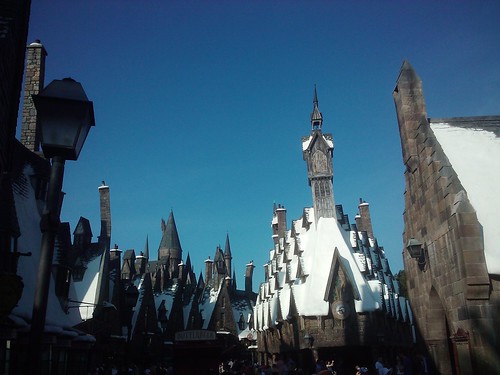
HARRY POTTER
Quite possibly the most beautiful piece of bad traffic management ever conceived.  I'm consistently amazed at how gorgeous and detailed IOA is while simultaneously missing the mark on traffic flow, ride capacity and American-sized seating.  The Harry Potter land itself was eye-popping and very true to the movies visually.  And much to my surprise, I liked the butterbeer.  The ride was also very well done and had a great queue line... with one exception.  SERIOUSLY, setting the queue in a greenhouse does not help with the stifling heat on a psychological level no matter how much fake snow you put outside.  The ride was cooler than I thought it would be.  Well done.  As for the queue to for the Dragon Challenge.  How did they manage to make the coolest queue in IOA into the lamest?
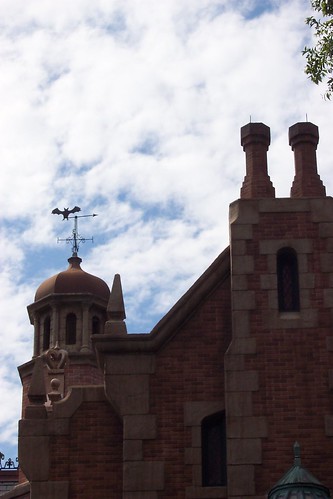
HAUNTED MANSION
I was really looking forward to this and I was not disappointed.  I believe this was done as a series of separate enhancements over a long period of time.  All of them were great without interfering in the original flavor of the attraction.  The staircase scene was my favorite and the new attic was extra creepy.  Loved this.

STAR TOURS 2
Holy ****!  I heard good things about this but still didn't know what to expect.  An amazing surprise is what I got.  This was more than an update.  It's a whole new attraction and the quality is unmatched.  I knew I was in for something cool when I saw the detailed new console graphics next to C3PO in the queue.  I thought the abandoned Rex pilots in the queue was a nice touch.  I only got to ride once (Kashyyyk and Coruscant) and was blown away.  The depth of the CGI is intense for a theme park ride.  It kind of made the prequel trilogy worth it.  I can't wait to do it again.

LMA w/ LIGHTNING MCQUEEN
The replacement of Herbie with characters from Cars was a good choice.  Making the sequence go on for what feels like 20 minutes... not so much.  Also, the assumption that everyone has seen Cars 2 was annoying.  The "story" made absolutely no sense to me, not having seen the 2nd film.

CAPTAIN EO
I don't know if it changed since re-opening or if the WDW version was done differently from Disneyland.  Either way, this was a much better experience.  Gone away was the annoying bounce through the entire "We Are Here to Change the World".  The subtler theater movement and whip warrior / rat tail programming was a nice enhancement here.  I know this attraction's rebirth may be a short one but I'm glad to see it back for now.

MONSTERS INC LAUGH FLOOR
This is just cute and I really enjoyed it.  Elements of it seem eerily similar to a proposal I made while working at WDW but that's OK.  I doubt they stole my idea but if they did, somebody owes me lunch.  As much as I miss Timekeeper, I do really like this.  Fun!

SPACE MOUNTAIN
I thought this was going to be another update like the Mansion.  Mostly, it was just a sponsor removal.  I still like the ride but the changes are very "Meh".  Why did they kill the man and dog robots in the exit scenes!?  Lame!

PIRATES
I knew these changes would be minimal.  Best I could tell, the only change was the film on the fog curtain to include the latest movie.  Since the fog curtain is the most out of place enhancement in the ride, I can't say the film change helped much.  Oh well.

FANTASMIC
Mixed feeling about my old stomping grounds here... and mostly about pyro.  Simply, the decision to cut pyro from the 1st half of the show (Sorcerer comets and flowers) was just wrong.  Shame on y'all.  The additions of pyro later in the show were cool though.  I miss the saxons on the Steamboat but the waterfalls do add some consistency.  Making all the tracer plates the same color was a little lame though.  The strobes and twinkle lights in the mountain looked better than I remembered seeing in a long time.  If they rehabbed those, good choice.  All nit-picking aside, it was nice to see the show again where a little piece of my soul (and a lot of my programmin still lives.

Whew!  I've got my park and family fix for a little while now.  I'm happy and exhausted (and somehow NOT sunburned for once).  I'd been looking forward to this trip for a long time and it was exactly what I hoped for.

Wednesday, July 13, 2011

Dreamfinder's Ride


I've started building the interior ride parts now.  First up also happens to be one of the more intimidating parts of the project for me: the Dreamfinder Vehicle.  Check out the photos HERE or download the Sketchup model HERE.  Some parts and 2 important occupants are still missing but I have to determine how I'm going to handle their animation before I can add them.  I hope to put the vehicle into the interactive model soon.

Sunday, July 3, 2011

Big Interactive JII Update

The latest version of the Journey Into Imagination simulation is online.  See it HERE.

At first glance, there aren't a lot of obvious changes to this.  But there are a TON of technical changes.  The biggest change is that the whole thing has been broken down into separate scenes to save processor power and load times.  I'm now maintaining 4 different Sketchup models, customized for use in the Untiy game engine: Outside, the Ride, Captain EO interior, and the Image Works (which is not available online yet, though you can go upstairs into the pyramid for a better view).  I've also turned off a lot of heavy geometry and will be fixing it to run smoother and faster in future versions.  Almost every inch of these models has been rebuilt in some way for use in Unity.  Programming will be easier in the future.

The ride simulation is now integrated directly into the overall model.  There still isn't much to see in there but it is working. You can look around 360 degrees while on the ride and press "Enter" when you want to get off.  Although it is still running at super speed for now, I do have the turntable synced up (mostly via programmer cheating) and the 90 degree rotation works as well.  I'll eventually add the proper speed changes, but that will probably wait until time to sync the soundtrack.

I have already started learning and integrating audio and lighting.  I'm a theatrical technician by trade so I'm having to un-learn how to use these tools.  They don't really work like real life in Unity.  You can see some early lighting attempts in the Captain EO scene.  I also put some (at least temporary) audio in most of the indoor areas.  Those elements should be working better in my next major update.

This little project has now officially become the most technically complicated thing I've ever taken on without being paid for it.  I'm a professional control systems programmer and I think I've become pretty adept at Sketchup, but the 3D game stuff is totally foreign to me.  It's fun though and I'm glad I'm doing this.  It is forcing me to learn not only Unity and more advanced Sketchup functions but also things like Javascript, C#, Blender (animation is another big learning curve for me), and the wonders of 3D geometry and math in general.  I'm really hoping to come out of this with a nice marketable skill set.  It feels like a long road to get there though.

I hope you enjoy the updates.  Please feel free to give me useful feedback (bad or good) or advice.  I'm also always on the hunt for new reference resources.  Soon I'll be crediting some great folks who have sent some wonderful material.  Thank you all.

Friday, June 17, 2011

Ride System Simulation

The last couple of days have been spent on one of the bigger technical challenges I've been preparing for.  I built the functioning ride system (and rider viewing engine).  It actually works!

I built this in Unity using a module called Splines.  The track, walls and scale are all correct but the speed is very high to offset the fact that there is basically nothing to see yet.  I still need to add the speed changes but that is proving complicated since my "train" is actually 4 autonomous vehicles that would close in or spread apart as they pass over a track-based speed trigger.  I need to figure out how to get the lead car's speed changes to trigger the other 3 at the same time.  Working on it.

The vehicles do make the 90 degree turn for the Flight of the Imagination scene but I haven't put in the elevation changes yet.  That is mostly because I don't know where they are yet.  I think my next challenge besides the speed triggers will be synchronizing the turntable.  I may be able to cheat with this since I only have to deal with one train and one POV.  I would love to eventually create a fully functional 3rd person view of the entire ride running at once.  That would be extremely complicated though.  I would basically be faced with the exact same technical challenges as the original ride programmers.  I'm going to focus solely on the single train 1st person ride POV for now.

My plan is to make this a "scene" in the game.  When you approach the load, you'll be moved into the vehicle and ride it restrained this way.  In the load scene, there will be an endless train passing through load to give the correct Omnimover appearance but it will switch to the single train for the ride.

Speaking of scenes (which I'm learning about now), I've decided to divide the interactive model into 4 scenes: outside (including the main ride lobby / load), the ride (with restrained POV), Captain EO interiors (with music), and eventually, The image Works.  This will lower the load times and break the project into more manageable chunks for programming.  The next major update should include that break up minus The Image Works.  We'll see.

Wednesday, June 8, 2011

Journey Into Interactive Online

The 1st draft of the interactive Journey Back Into Imagination is now up and running online.  Check it out HERE.

It doesn't seem like there's much to it yet (and there really isn't), but it was quite a bit more work than I expected.  I started working on the interactive model with some free game development software called 3D Rad.  I was running into limitations including not being Mac compatible and a really fussy web player so I eventually decided to try Unity.  Unity is a lot more complicated but very flexible (and still free).  I finally have most of the basics figured out.  My goal wasn't really to copycat all of the software and techniques being used over at Horizons Resurrected.  I've actually researched and tried about 20 different programs for various parts of this project and eventually ended up using the same stuff.  I know first hand why he picked what he did now.  Currently, I'm using Google Sketchup 8 to build the models (see some of the parts HERE).  I then export them using PlayUp into Unity to build the "game".

I don't really have  background in 3D graphics or game development so I'm learning everything as I go.  Fun and frustrating.  I started playing with Google Sketchup about a year ago and think I've become relatively proficient at it, but I have been doing a lot of cheating.  When shapes got complicated, I usually hid the problems with clever coloring or a carefully placed square.  My models were built to be seen from specific angles or in videos where I controlled the view.  In an interactive model where you can wander around on your own, that is not practical.  Also, all of that hidden geometry covered up in the background still gets rendered by the game software.  Things get slow and clunky.

I've spent the past couple of weeks going through nearly every inch of the JII model.  I've removed tons of hidden junk geometry and simplified a lot of messy intersections.  I've also made some of the interior spaces accessible so all of my cheats that made the exterior look good while mucking up the interior had to go.  I've also broken it down into smaller chunks (called components) and set all of them to the same axis orientation for better control in Unity.

And then there are the faces.  I've learned that all faces have a front and a back.  In Sketchup, that isn't a big deal because you can just paint either side the color you want.  In Unity, the backside of faces are invisible (at least by default - I don't know if that can be changed yet).  A huge part of the work this last week has been flipping about half of the hundreds of faces in this model and then repainting them.  That work is not entirely done.  You can still see many invisible walls, ceilings and other surfaces when you go inside the buildings.  Fixing that is my next task.

I'm starting to fix up the basic interior structures today.  My plan is to try and add a few fancy features to the exterior after that: better textures, animated water features and jumping fountains, other people, the missing trees, and maybe some lighting so I can do night scenes as well.  In the interior areas that are fleshed out already, I need to add lighting, working escalators (and maybe the elevator too) and I want to start adding some sound as well.

Building the inside of the ride and Captain EO theater are farther ahead but still the ultimate goal.  If I get pretty decent at Unity, maybe I can put some functioning Image Works elements in as well.  We'll see...

And now back to work.

Tuesday, May 31, 2011

Journey Into Interactive

Interactive programming in 3D Rad.
This weekend was a time of great success and head-banging failure for my Journey project.  My goal was to create an interactive version of the model using game software so others could explore and eventually ride the recreation from the web.  The success part was that I did manage to convert my Sketchup model into an explorable "game" using 3D Rad software.  It's quite cool.  The failure was my inability to get the web embedding feature to work.  In the process, I discovered that it would be unavailable to Mac users as well.  I decided to change gears a bit.

I started over with Unity software.  I think it will have better quality and flexibility, but it will also work in all formats.  The problem is that it is a lot more complicated.  I'm reading all the documentation now.  This doesn't help my patience though.  To get right up to this particular finish line then go back and start over is not the sort of thing I do easily.  But I have no choice, I guess.  I'll live.

While I work on rebuilding the interactive environment, I decided to start doing nicer renderings of the existing model.  I'll try to run one each night for a little while.  I'm also continuing to tweak the exterior model and build the interior.  Despite a minor set back, I'm still having fun with it so the journey continues.

1st rendering attempt.  Some color weirdness below the small pyramid and the Kodak logo vanished, but not bad overall.

Thursday, May 26, 2011

Journey Updates

I'm starting to get my momentum back (as well as a tiny bit more spare time).  The results are new pieces and parts to my JII Recreation project.

The biggest change (which was really bugging me) is the new pyramids.  They were just just temporary shapes with a diamond-ish pattern on them before.  Now they are actual 3D structures with transparency.

I also finally tackled the ride vehicle mostly successfully.  This was my 6th attempt but I'm pretty happy with it now.

The reason for both of these new additions are the result of my starting the interior ride and Image Works lobbies.  The upstairs portion, especially, kind of required it.  You can see new photos of all these new parts at the Facebook Page or Flickr gallery.

Monday, May 16, 2011

Recreating Figment

Figment Progress

I'm working on building the basic Figment figure right now. I'm still not done with the exterior yet but I realized I need to build him because he appears as a topiary in front of the Kodak store. Might as well get the real version done in the process. I'll deal with his costumes and other poses once I start creating the internal scenes.

I'm learning as I research that I have several inaccurate elements in my model. Little things I would never think of normally. For example, the simplistic fountain structure is not the original one. The original was significantly more complicated. Yay... I'll fix that at some point. Also, the planters around the ride entrance were added later. It's easy enough to delete them but they gave me a lot of headaches (seriously - stupid bushes) so I don't have the heart to destroy them yet. Eventually.

So in the near future, I'm going to fix the wrong stuff, flesh out the rest of the landscaping, and find a better way to represent the glass pyramids. Once the exterior is complete, I will move on to the lobby for the ride and Captain EO. These are both visible in the external model. Once that is done, I will move to a new copy of the model for the interior to keep the file size down. This exterior model does actually have all of the internal walls in place but the rooms are empty.

If anyone out there has the track elevations, it would help me out. Back to work...

Monday, May 9, 2011

JII Recreation Resumes... Slowly

I'm finally getting back to work on this after taking a break to move and start a new job with a pretty brutal schedule. Progress will still be slow for awhile but there will be progress.

Tonight, I started a Facebook Page for this project and created a Google Sketchup collection for all the various parts going into the main model. If you're a Google Sketchup user like me feel free to download them and discover what a complete cheater hack I am at this. And if you want to help me build parts as I get into the interiors, let me know. There are going to be A LOT of parts eventually
.

Check 'em out:

Friday, March 18, 2011

Journey Into Imagination Recreation 2

Journey Into Imagination 3-18-2011
A little over a week ago, I started a new project to occupy my spare time. I've been recreating the original Journey Into Imagination pavilion from WDW's EPCOT in Google Sketchup. It's been a lot of fun and I've had some research help from some great people.

I'm posting a little bit about where I'm at with this because I'm going to be taking a break from it for a couple of weeks. I'm about to move very shortly and start a new job so I won't have much spare time. For those that don't know what I'm talking about, I'll explain shortly in another post.

My eventual goal is to recreate the entire attraction including the ride and theater inside. This model already contains most of the major internal walls but the level of complexity means I'm going to have to build this in several parts. This first model is focused on the exteriors and the rooms you can see through the windows (ride lobby, Captain EO entrance and exit, Kodak store). I think I'm pretty close to finished outside. I just have a few finishing touches like benches, trash cans, and remaining landscaping.

I have tried my best to recreate the original color schemes but that is proving difficult with the poor documentation available. I'm also kind of guessing at a lot of the details. I noticed that the plants and even some planters change, move and disappear throughout the years. There are a lot of anachronisms here that I hope to straighten out eventually. I'm trying to target the look of the original JII / original EO era (my personal favorite). And for those of you that are really detail-oriented, I know there is quite a bit of scale-fudging (Captain EO lobby in particular). I only have ground plans so EVERYTHING vertical has been eyeballed from photos and videos. I think I'm close enough for nostalgia though. I must admit, the exterior seemed so much simpler than it really is when I took this on. All of the crazy triangular faces and sloping curved walkways challenged me but I'm learning a lot from it. Since this isn't my design, cheating is harder to get away with.

Anyway, that's where I am right now. I hope to resume in a couple of week and start hitting the insides.
Here are the latest new shots:
Journey Into Imagination 3-18-2011 Journey Into Imagination 3-18-2011 Journey Into Imagination 3-18-2011 Journey Into Imagination 3-18-2011

Wednesday, March 9, 2011

Journey Into Imagination Recreation

Journey Into Imagination
I've started a new 3D drawing project as a hobby. I'm still working on my other design stuff but I thought it would be a fun challenge to recreate something that no longer exists (entirely).

I'm rebuilding the original version of EPCOT Center's Journey Into Imagination attraction in Google Sketchup. My intention is to reconstruct the entire pavilion including all the interior ride elements. This may take a long time. You can see my progress HERE.

At press time, I completed the first draft of the ride building exterior and the original sign. I realize that the building is sporting the newer paint job but I did that for comparison with my reference photos. I will be changing it to the opening day color scheme shortly.

I do not have access to detailed blueprints, but I've managed to get some good ground plans and some rough elevation info. The truth is, I'm using the ground plans as a guide but most of the drawing is approximated. I'm going to get it as close as I can but it won't be technically perfect at all. I figure the inside will involve a lot of guess-work so the outside doesn't have to be 100% either. I just want to make it a good trip down memory lane for myself and like-minded others.

If anyone has any good photos, videos, or blueprints, I'd love to get copies so I can get as detailed as possible. Thanks!

Finally, I also want to say that this has been inspired by (and in some cases, assisted with advice and drawings from) these fine recreation projects: Enfilm's Flickr Drawings, Horizons: Resurrected, The Mighty Microscope, and Virtual Toad. Thanks guys!

Tuesday, March 1, 2011

Unfinished Projects

I have been extremely distracted lately. There is a lot of stuff going on including good stuff, bad stuff and even a few things that manage to be both. When I get like this, I tend to start and stop about a million things. I get very whim-oriented and don't really finish anything. Just so I can feel like I actually have something to show for my stack of unfinished work, I though I'd post a bit about some of the things I've started.

Hopefully, I'll get back to finishing it once my life is a bit less chaotic.

THE TOY FACTORY
This is a flume ride based on a tour through a quirky and cartoon-like toy factory (think of the visual style of the movie, Toys). The ride content is presented in a funhouse / dark ride style with scenic elements that are almost entirely flat. I want that cardboard cut-out Viewmaster kind of depth. So far, I have modeled the entire ride system, vehicles, track, building and some of the exterior decorations. I have also started the interior but only finished part of the load room. The unique element of this ride is that it randomly chooses one of 3 possible paths, twice during the ride. Here are some pictures:

Unfinished Projects: Toy Factory Ride Unfinished Projects: Toy Factory Ride Toy Boats Flume Ride Track Flume Ride Track

ATLANTIS WATERPARK
I admit, I stopped this one because it started turning into a job. That would be fine if it were a job, but since I'm not being paid, I reserve the right to move on when I'm not having fun with it anymore. What killed me was the tedious rockwork modeling. Blah. Anyway, this was a design for a waterpark based on the lost continent of Atlantis. I know it isn't terribly original but I actually thought of this back in the early 90's and I wanted to see if I could represent my thoughts more accurately in 3D. Once I realized I could, I kind of lost interest. There is a good possibility that I will never finish this one. Pictures:

Unfinished Projects: Atlantis Waterpark Unfinished Projects: Atlantis Waterpark

HOTEL
I started building this one mostly as an exercise in finished rendering. There is no theme, just a standard mega-resort kind of thing. I put a lot of effort into keeping the scale as accurate as I could and I did a lot of work with lighting too. I dropped this one mostly because it was getting a little too Vegas and Vegas kind of annoys me right now (a big part of my distractions lately). Here are some photos:

Hotel in Daylight Hotel at Night Hotel Courtyard Hotel at Night Hotel Glass Test Hotel Day and Night

GOTHIC THEATER
I plan to finish this one. I am modeling a gothic-style theater from a story written by a friend of mine. There are some very specific story elements (gargoyles in particular) that I was having a very hard time representing the way I saw them. That snag stopped me but as soon as I figure out how to draw them right, I'll finish. This one is actually much further along than this one photo suggests:

Unfinished Projects: Gothic Theater

I have a handful of others that I've started but aren't far enough along to show including a restaurant, bumper boat / water battle, and a roller coaster with a really strange launch system. I'll get to them eventually. I need to get focused first... maybe next week.

Wednesday, February 23, 2011

Favorite Memory - A Night in the Haunted Mansion Ballroom

Haunted Mansion
I wrote this as part of a meme on my regular blog which asked "what is you favorite memory?".

I have many "favorite" memories and I find them hard to rank. Many events are cherished memories but they aren't singular snapshot moments. They took place over several hours or days. To avoid writing a novel, I though I'd go with a single postcard-like memory. Of course, this moment has some backstory leading up to it so I'm probably going to end up with a long story anyway.

The history (which I know I've told in parts elsewhere)... When I was 10 years old, I wanted to be an inventor. Then , while rummaging through old boxes in the attic, I found a postacard depicting the Hitchhiking Ghosts from Disneyland's Haunted Mansion. It was a souvenir from a trip my parents had taken years before. Something in me snapped at that moment. From then on, I've been a huge fan of Disney parks and their magical technologies. I didn't want to be an inventor anymore. I wanted to be an Imagineer.

18 years later, I got the chance to work for Walt Disney Imagineering (WDI) in Orlando. I was temporarily transferred from my Tech job at Fantasmic to the WDI Show Lighting department. My main jobs there were to update documentation and maintain the artistic intent of the lighting in the attractions at Magic Kingdom. For a Disney Nerd like me, this was an all access pass. Getting to (in fact, getting paid to) wander around in classic attractions in the middle of the night by myself was a dream come true.

But the coolest moment happened in my first week there as my boss was showing me around. One of my biggest tasks was to update the lighting docs for the Haunted Mansion. We're talking about 1970's blueprints here. OMG, people. He took me into the Mansion and we walked around on the sets and behind and underneath them. I was so overwhelmed with joy that I could hardly function as a professional. I don't think I remembered anything practical from the tour. I was very struck by how temporary it all looked. Early Disney attractions were very much built like movie sets. There was a lot of rickety wood and very temporary repairs everywhere. The whole attraction was actually freestanding away from the walls of the show building. It looked exactly like a soundstage with movie sets in it. Amazing. It was also a maze. I continued to get lost in there for months after that.

We worked our way through that maze of back passages and turned into a strangely familiar space. I didn't realize where I was at first. There was black cloth, apparently pointless wooden frames, oddly mounted lighting fixtures, tracks on the floor, a strong smell of grease, and a whole bunch of animatronics that looked like someone forgot to paint them. It was like this cheap and awful recreation of the ballroom scene that someone had built in their garage. And then we stepped out from behind all that black cloth and that's when it happened.

I was standing on the floor of the Ballroom in the Haunted Mansion!!!

And we had just entered through the lower reflection room. This was my Mecca. My hallowed ground. My Holy Land. I was tingling with goose bumps and adrenaline. I know this might seem like nothing to the average person, but I had spent 18 years obsessed with the Mansion since I first saw those Hitchhiking Ghosts. This set was the most iconic scene from the ride and it was what I most wanted to see.

I wanted to raise my arms and shout, "I'm the 1000th ghost, mofos!", but I decided that might not go over too well.

In stark contrast to the haphazard assembly of the reflection room elements, the Ballroom was perfect in every detail, even up close. It was like a museum. Everything was so carefully placed (including miles of fake spiderwebs) that I was afraid to touch anything. My boss casually picked up one of the plates on the dining table to reveal a Polaroid underneath that showed exactly how the place settings should be set.

The weirdest thing is that out of every scene in every ride I walked on in the months I was working there, the Ballroom was the only one that had no characters or animatronics in it at all. They were all in the upper and lower reflection rooms. The emptiness made it seem so much creepier. It made it more real and powerful to me. This probably sounds silly, I know. I can't explain entirely to my satisfaction.

All I know is that the moment I realized where I was standing was as intense to me as the moment I found that postcard in the attic. It only reinforced who I was, what I love, and what I want to be. I hope to make the same pilgrimage at Disneyland someday. If I'm lucky, maybe I'll get a chance to be their 1000th ghost too.

Wednesday, January 26, 2011

Render Test Results

Monster Mansion Final Render
After 11 hours, I got this image. It is a Kerkythea render of a Google Sketchup model. I think it came out a bit like a painting. I'm pretty pleased.

THIS is a previous render where I didn't get the colors and levels of the 31 lighting fixtures quite right and THIS is the original Sketchup model from THIS project.

I learned quite a bit from this round. Next lesson will be network rendering and making sure all of the components make the transfer (look closely - the window frames are missing - oops).

My new hobby is certainly not about instant gratification but it is fun for me. Next up is a daytime rendering. Should be interesting.

Saturday, January 22, 2011

Design for Fun #9 - TRON: Adventures Thru Digital Space

TRON: Adventure Thru Digital Space TRON - S1: ENCOM (Ride Load) TRON - S3: Tron City TRON - S4: Deadly Discs TRON - S5: Tank Encounter TRON - S6: End of Line Club TRON - S8: Lightcycle Arena TRON - S9: Bridge TRON - S10: I/O Tower

Here is my latest attraction design for my own amusement. And this one, more than any previous, is all about the "for fun" part. I've wanted to do a TRON ride since I was 12 and at 38, I finally got around to it.

This is an imaginary dark ride based on a mixture of the old and new TRON movies. It's an omnimover ride modeled in the style of the early 80's mega-dark rides featured in EPCOT Center's Future World. I also built it as though it were a replacement for Adventure Thru Inner Space (which was replaced by Disneyland's Star Tours in reality). In accordance with tradition, the ride has references to its predecessor. The title is obvious but I also reused the microscopic crystals for the background in the tank scene.

To make this ride, I downloaded an existing Sketchup model of Inner Space and excavated it. I then squeezed my ride into the existing room and track layout. That was kind of fun. I also made use of other existing Sketchup models from the 3D warehouse, especially for the various vehicles. I modified many of them though.

Like most omnimover rides, there is dialog that triggers at different points along the track. I've included that dialog in the picture descriptions on Flickr. There are 25 pictures in that set, with some of them linked by thumbnail at the top of this post. I'm still planning to continue trying to render scenes from this ride and my others in a higher quality. I've been experimenting with that already.

If you are a stranger wandering on to this from the web, this has no affiliation with the Disney company at all and will never be built. I did this just to amuse my inner child. I hope it amuses yours too.
EOL

Tuesday, January 18, 2011

Tron Ride: First Render Test

Render Test
This is my first render test for a Tron-themed ride project I just started (just for fun and practice). I used Indigo Renderer on a Google Sketchup scene. Click HERE to see the original.

Unfortunately, this is an incomplete render. Getting this far took 36 hours and the next step would be another 36. Obviously I have issues to resolve and I'm looking into other render options now (like Blender). There are goofs in here on my part like the blue on the omnimovers, missing glow on the lightcycle, and a big ugly reflection of an unfinished room in the background. This is challenging but I'm having fun. I have decided that I'm going to continue pursuing this. Glitches aside, this did render almost exactly as I imagined it. I think that's a good sign.

The ride is about halfway finished from a Sketchup perspective (see HERE). I'll post the ride-through video and regular Sketchup graphic shots when they're done and then get back to playing with the rendering. I may try to create some interactive walk-throughs of this and past rides with Unity (already downloaded). I saw it work nicely HERE.

Friday, January 14, 2011

Design for Fun: Starting a TRON Ride

My inner 12 year old is very happy today. I've decided what my next design-for-fun project is going to be. Since I was a kid, I've always wanted to do a few things:

- Design a new ride for an existing space. I just think that's a fun challenge.
- Design a ride for Disney.
- Design an attraction based on the TRON universe.

I started with the idea of doing a new ride in an existing space and I wanted to stick with a traditional and gimmick-free dark ride (no shooting galleries or motion bases). In the Sketchup 3D Warehouse, I found a nice full model of Disneyland's Adventure Thru Inner Space. I decided to pretend that it didn't already turn into Star Tours and began cleaning out the model (virtual demolition, essentially). Only the major walls and track remain as you can see in the photo. I am further along than that now though.

I'm creating a ride that technically would belong at Disneyland and in Tomorrowland. After rejecting some other futuristic ideas, I decided to do the TRON thing. It was only a matter of time. I figure WDI is probably working on something now so I should get my play project done before their real attraction influences me. My ride will be an open house by ENCOM to take you on a tour of the future as Flynn saw it. Guests board vehicles that are transfered to the grid for a tour of the digital city including stops at the Game Grid and End of Line Club (newly refurbished). The Mighty Microscope is now the laser. My working title for the ride right now is TRON: Excursion.

This project will be a little bit different (and time-consuming) for another reason. I recently got a copy of Indigo Renderer for Sketchup. It will allow me to realistically render my scenes including the use of lighting and reflections. I think a Tron dark ride is the perfect environment to test this out. Here is an example of someone else's work with this program that I think gives you an idea of what I'm thinking. I'll post render tests as I finish them.

Now back to work on the future that never was and most likely can't be...

Wednesday, January 12, 2011

Operation: "Portfolio Fix" is Done (probably)

I've felt a change in the air lately.  I don't know if it's going to play out exactly like I expect (it rarely does).  It doesn't matter.  What matters is that when I feel like this, I always get this overwhelming urge to tie things up and update the outdated.  And I generally can't stop until I get it done.  This particular impending change has inspired me to fix job-related stuff: resume, portfolios, etc.  I've started and stopped this effort many times in the past two years without much to show for it.  This time, I started about a week ago and finally "finished" tonight.

My main goal was to get all of my recent work (professional and personal) in the resume and portfolio (online and PDF versions).  Most of the 2000's were not represented but I fixed that a few days ago.  Tonight, I centralized all of my online portfolio stuff.  All of the missing links are in and most of the external links are gone.  It's all one website now.  I also felt the need to clean up the visual clutter and the junk in the code too.  Microsoft worked against me there.  There's still one weird bug with the "back buttons" on two pages that I can't quite kill.  Maybe I'll find them later.

Anyway, if you're curious about the kind of stuff I've done for work or to keep myself amused (and you aren't already sick of seeing it in various forms on this blog), head on over HERE.  Some pages may require refreshes if you've been there recently.  I'm also open to feedback, especially if something is wrong or bad.  I'm a little obsessed with getting it all fixed up right now.

For now, I think I'm done.  Next week, I'll have a new obsession.